All tests (including simulated hardware failure for HA/failover) completed successfully on the shared zone, so we are now going to concentrate on the advanced zone with full IaaS offering capabilities.
What is the advanced zone ?
Well, the most appropriate analogy would be with a local lan connected to the internet through an advanced router.
Each advanced zone has own router which can do NAT, IPSec VPN, firewall, DHCP, load balancing, etc. You can have your own virtual office with everything, file server, gateway, application server(s), back-up space (we will add secondary storages at a lower price), workstations with the full freedom of importing own templates/ISOs, take snapshots, etc.
Basically, you will be able to have a virtual infrastructure in place, with much more than a real infrastructure can offer in terms of back-up and redundancies, conveniently setup in a few clicks, scalable and without upfront investments in hardware and with a reliable connection. If you do not think this is possible, follow this tutorial !
OK, let's start.
I will create a few VMs using templates for speed. Say, one will be a Debian smb server and another a workstation with ubuntu desktop. They will connect to the internet using NAT through the advanced router and between themselves on the local VLAN using non-routable IPs. The IPSec VPN can be used to bridge 2 LANs over the internet, one virtual, here and one real, say at your home, the VMs with us will act like being on your home/office LAN. This will not be covered here, though, just to show how easy it is to set up this end, the other end can be secured as easily with ipcop/pfsense, for example as well as many other firewall distributions, including DD-WRT.
First, lets create the debian server and while doing so we will also create the isolated network and firewall rules for it.
Go to your CloudStack UI:
https://master.iwstack.com/client/
Insert your username and password as well as domain, then go to instances/add instance:
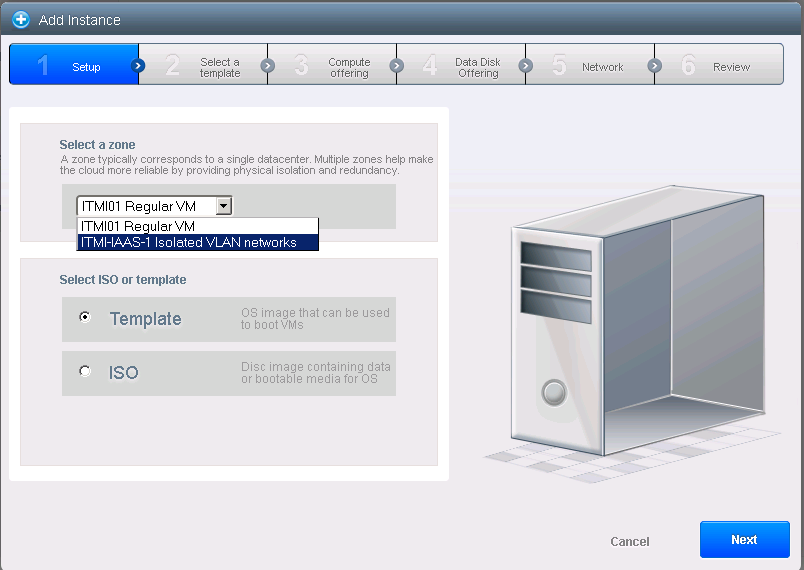
Make sure you select the IAAS zone as shown in picture. While you can select an ISO, we will use one of the minimal templates to expedite things and to take advantage of the password reset feature. In this case will use a Debian 7 32 bit image:
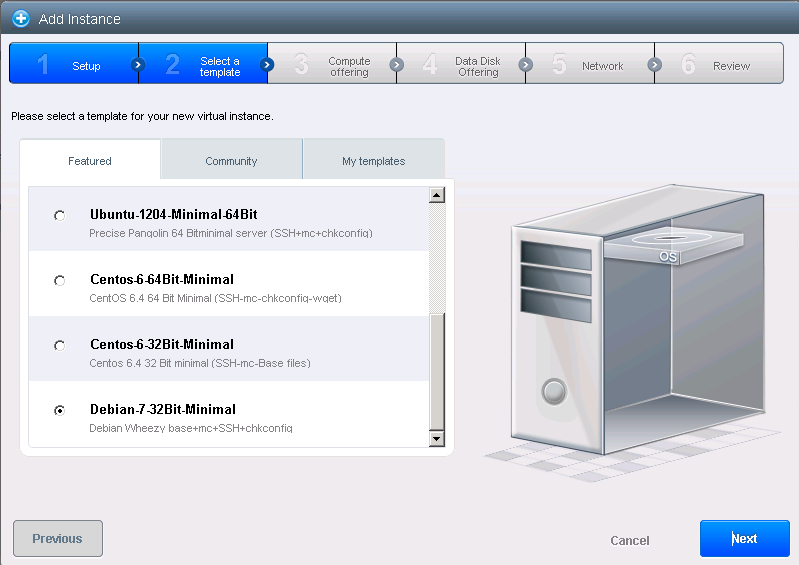
All images are 10 GB in disk size by default, you can select memory and additional disks in the following screens.
I left default 1 core 10 GB disk and 512 RAM. he one core will appear at various speeds, do not worry, we do not actually provide a 2 MHz CPU, that is set for resource accounting purposes, CPUs are fair share.
The step 5, network, is the place where we create our isolated VLAN. We will need to give it a name. Later we can add more VMs by selecting it here.
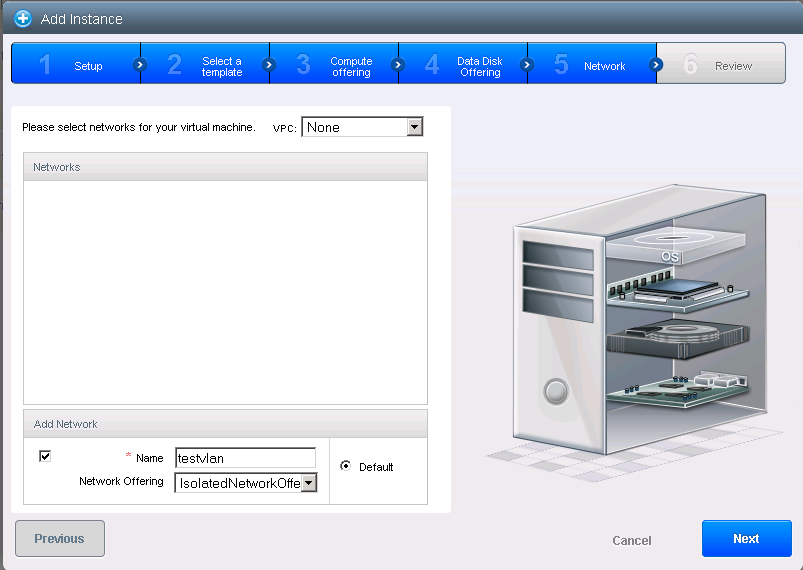
In the last step you can give a name to your VM as well make it part of a group (I have chosen myinfrastructure as group name).
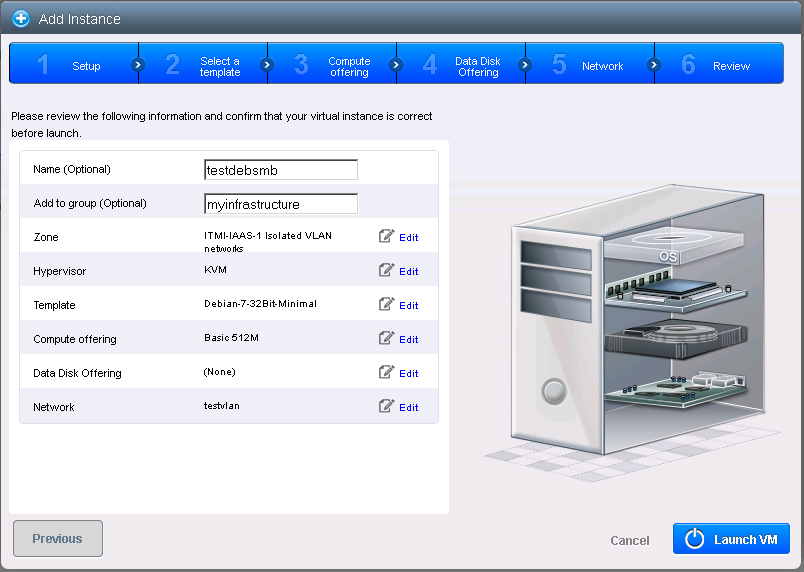
Click on LaunchVM.
It will take a while as the whole network is setup now, added the router, the vlan, the VM and template transferred, password created, etc. Make sure you are writing down or copy the password by selecting it with the mouse and CTRL+c. If you didnt manage, no worry, you can stop the VM later and do a password reset. Do not click around, you may miss the pop-up with the password:
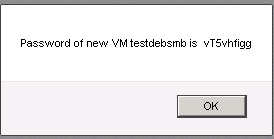
Now, as soon as the zone is created, there is no internet access (but all the VMs can connect to each other using the local IPs), all the machines are given non-routable IPs through DHCP and there is no traffic allowed through the router. You need to allow it piece by piece.
First, lets open a console and see the VM we just installed (hover the mouse over the + in the right):
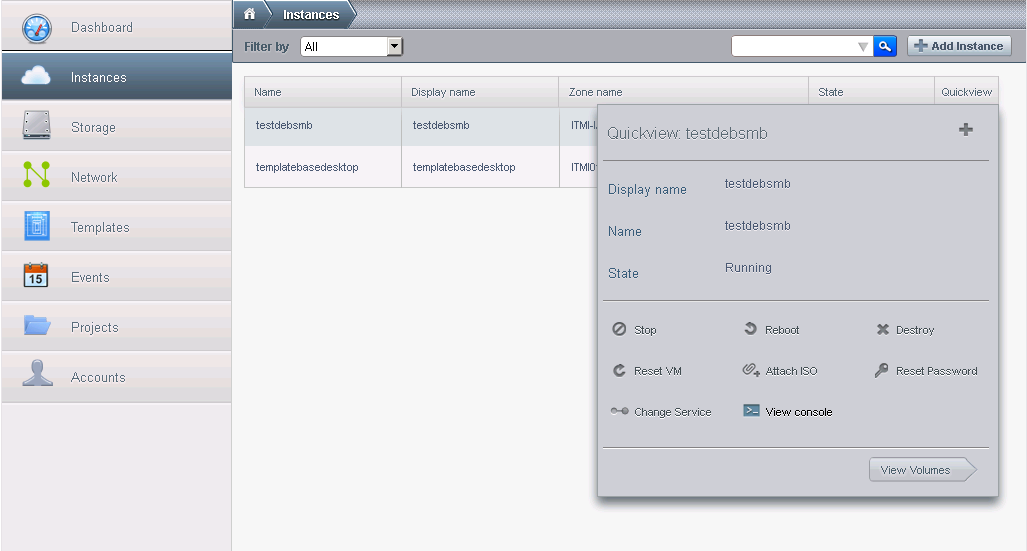
You will see that it cannot connect to the internet, all traffic is blocked, also, ifconfig will show a non-routable IP.
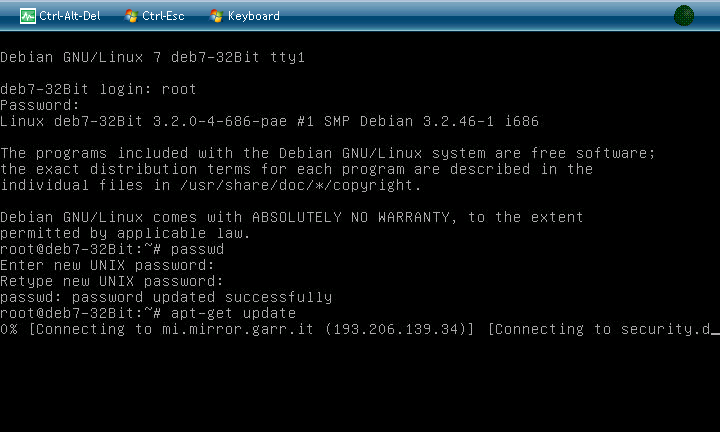
In order to rectify this, we will have to open up the firewall to allow outgoing connections (I will allow all on all ports, remember, this is only for outgoing traffic).
Go to Network and go to the + at the isolated vlan we created, select view IP addresses and go again over the + at the right, click enable VPN:
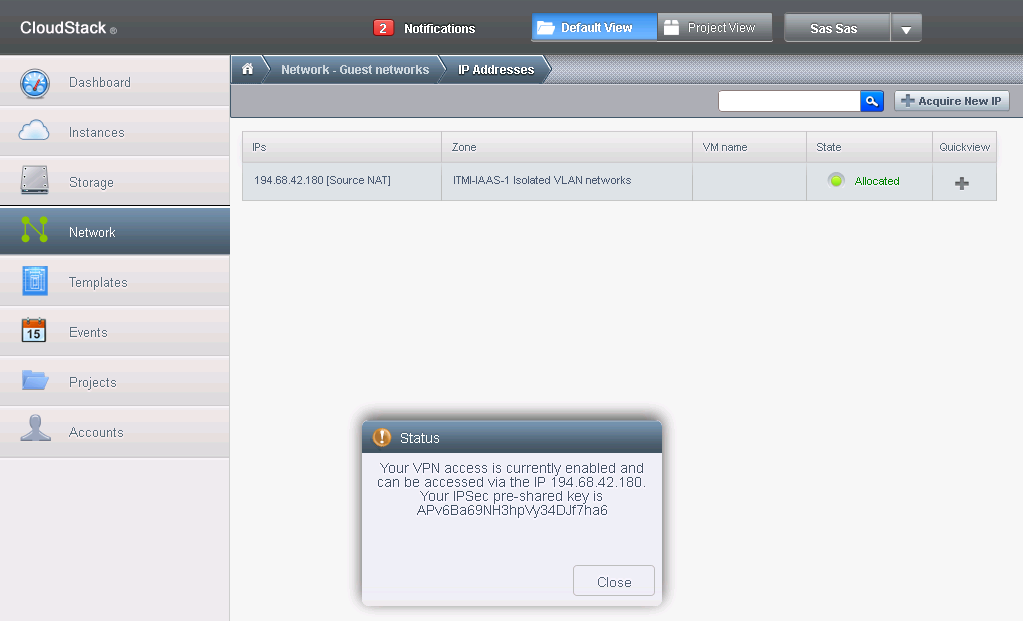
Now you can connect to the network over VPN and bridge your home/office LAN with the one in our cloud, you do not need to enable any internet access if you dont need, those machines will appear in your local LAN, but it is very likely you will need internet access for one thing or the other unless you wish to give internet access through your home/office gateway (highly unlikely).
Lets now give internet access for the outgoing connections (i.e. the VMs will be able to go on the internet, but the internet will not be able to access them).
In the network section, click on the network name and go to Egress rules and make it look like in the picture:

That means we allow the VM to access the internet unrestricted. You can, of course, do a more granular access, but I will need all the VMS to access the Internet unrestricted. Therefore I write in CIDR box 0.0.0.0/0 (the whole internet) and select "all" in protocols, meaning the VM will be able to exit on all ports and protocols making it equivalent to your home computer in most cases (unless you have a restrictive firewall for some reason).
Now we are able to update the vm and ping everything we wish, but we will not be able to access the VM from outside, we will need to allow at least ssh (port 22) to connect. For that we need to do some port forwarding.
Go to the Network section, click the VLAN name, View IP Addresses, click on the IP address, go to the "Configuration" Tab and you will see the network configuration in a nice scheme:
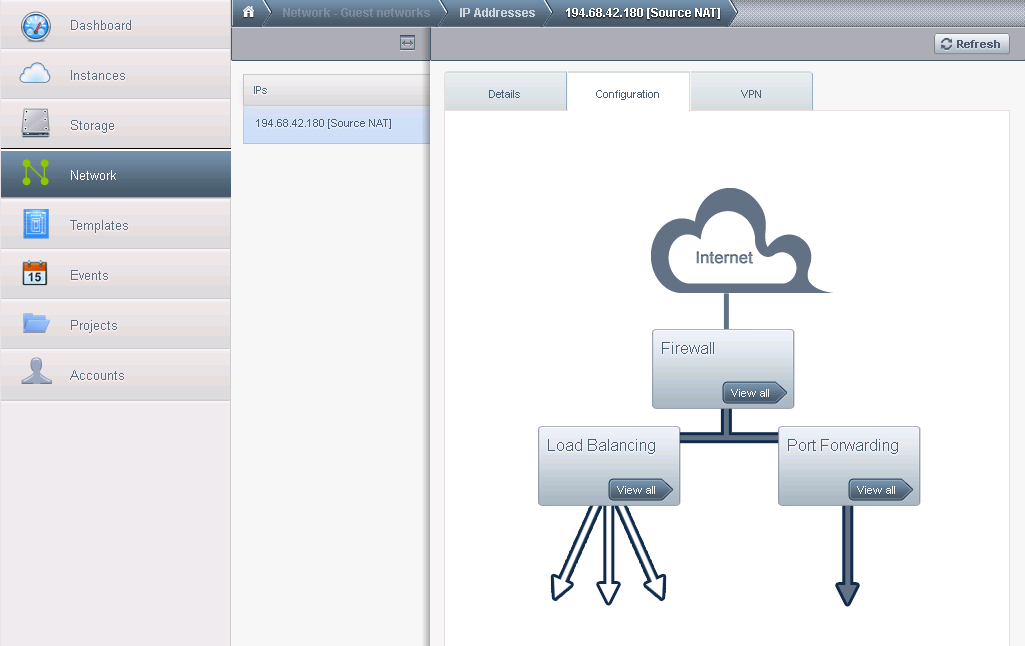
Right now we leave load balancing out, we will be going port forward to allow the internet to access some ports on our machine.
First click View all in the Port forward section:

In this case I forwarded the public port 222 to port 22 of the VM internal address. I will also need to allow the port 222 through the firewall, so I go to the

And click on View all in the firewall section. There are already some rules there autocreated when we setup the VPN. Now we need to allow connections from all internet (you can put your IP there if you will connect only from that machine and you have a static IP by changing 0.0.0.0/0 with xxx.xxx.xxx.xxx/32 where xxx.xxx.xxx.xxx is your IP and 32 is the mask for 1 IP only) port 222 TCP (not 22, the connection from outside will go to port 222, remember if you change port number). In order to do that, add the rule like in the picture and click Add:
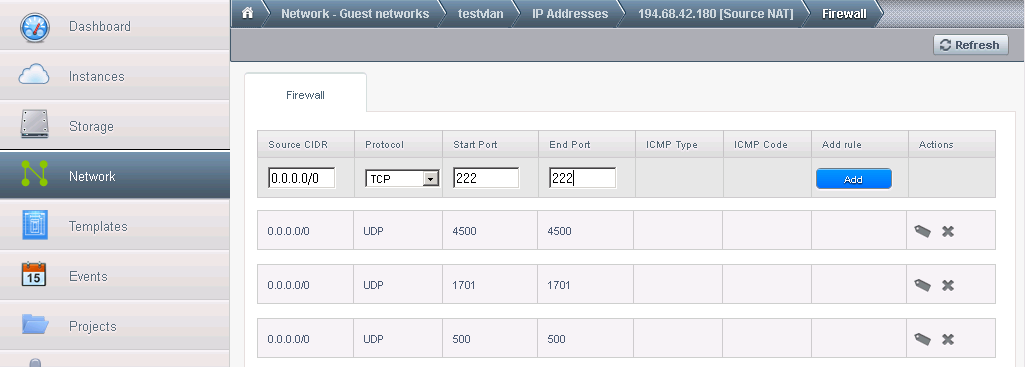
As you can see. if I wish to move SSH to listen on another port, I dont have to do any change in the VM, I can do this from the firewall directly, so, i will connect to the VM by using the public IP address and port 222, the firewall will do the rest:
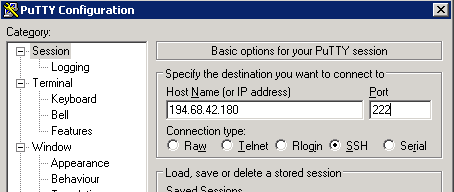
You now have SSH access to your VM and it has full access to the internet. If you wish to add a web server, you will need to allow port 80 too through the firewall or 443 for HTTPS. Every service you add, you need to allow the corresponding port or range to be accessible through the firewall. If you have no concern and wisha ll ports to be open, you can just put ports from 1-65535 in both UDP and TCP open in the firewall from CIDR 0.0.0.0/0 and the firewall will block only ICMP (ping for instance). In order to allow ping too, allow ICMP type 8 and ICMP type 0. More details here:
viewtopic.php?f=8&t=1178

